A client recently had the request to add the “Open in Explorer” link for a specific document library on a site. It’s understandable, considering that finding the Open in Explorer link requires understanding of the ribbon and knowing where to look for it; this site would be targeted at users with minimal SharePoint knowledge.
Browser considerations
Microsoft says that IE 7+ is required to use Open in Explorer. However, Microsoft also says that only IE 8+ is supported for SharePoint Online. Your mileage may vary.
I tested it in Chrome, which did not work. I have heard rumors that it works in Firefox, but that sounds unlikely to me, considering it is tapping into Windows functionality.
Troubleshooting Open in Explorer functionality
The functionality seems to be a bit sensitive and the conditions need to be just right for it to work.
Note #1: “Open with Explorer” may not work if you have the 64-bit version Internet Explorer and/or the 64-bit version of Microsoft Office installed.
Note #2: There are some issues with IE 10 and this functionality; I got it working with IE10 (32-bit) with the “keep me signed in” trick – see below for more information.
Typical error messages:
- “Your client does not support opening this list with Windows Explorer.”
- “We’re having a problem opening this location in File Explorer. Add this web site to your Trusted Sites list and try again.”
Solutions:
- Ensure that the WebClient service is started (this is preconfigured on modern versions of Windows)
- Ensure that you are using a supported browser (IE 8+)
- Add “https://*.sharepoint.com” to Local intranet site or trusted zones in your IE settings
- Sign in to the SharePoint Online site by using your Office 365 credentials, and make sure that you click to select the Keep me signed in check box.
Creating the link
The Open in Explorer link in the ribbon is nothing more than JavaScript. We can quite easily build our own.
The basic format is as follows, for the URL https://example.sharepoint.com/template/Shared Documents/:
<a onclick="NavigateHttpFolder('https:\u002f\u002example.sharepoint.com\u002ftemplate\u002fShared\u0020Documents', 'blank');" href="#">Open in Explorer</a>
The NavigateHttpFolder function resides in the core.js file and is usually called automatically. It was a non-issue on SharePoint Online with (mostly) default branding.
Note that you need a \u002f for a backslash, and a \u0020 for a space.
In my example further on, I’ve made the link relative – it works both ways.
Making the link dynamic
The thing is, the cilent wanted a link that could be used on a site template for different projects. Each project has its own Shared Documents library, which I want to link to without having to change URL by hand. This is where I started to make it a little bit prettier:
<br /><script type="text/javascript">// <![CDATA[
var CurrentSiteURL = document.location.pathname.split("/").slice(1,2).toString();
var ExplorerViewURL = "\u002f"+CurrentSiteURL+"\u002fShared\u0020Documents";
var LinkText = "Open Shared Documents in Explorer View"
// ]]></script><br /><br /><a onclick="NavigateHttpFolder(ExplorerViewURL, 'blank');" href="#"><br /><script type="text/javascript">// <![CDATA[
document.write(LinkText);
// ]]></script></a> <br /><br />
I knew that the client would never have more than one level of project sites, i.e. a root site with underlying project sites. So, I grabbed the current URL, split it into an array based on where the forward slashes are and then just grabbed the site information, i.e. “template” from my previous example.
I used the CurrentSiteURL variable to build the URL for the document library. It made sense to make it relative, in case the base URL ever changes.
I put the link text into the variable LinkText, just to make it look nice when building the actual HTML link. It would also allow for a potential dynamic link text.
Link placement/usage
The client also wanted this Open in Explorer link in the quick launch navigation. When I tried this on SharePoint Online/SharePoint 2013, I got a nice error:
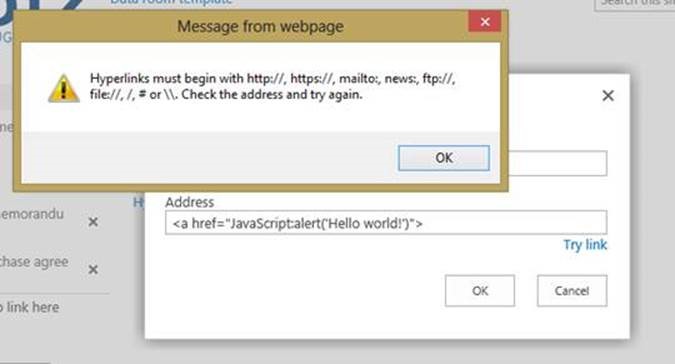
It turns out that there’s new security in the newer versions of SharePoint and you can’t add JavaScript to the menu anymore. At least, not without using real code, features and stuff that was beyond the scope of this project.
So I did the following:
- Put the entire script into OpenInExplorer.js in the Style Library, including the HTML
- Place a content editor webpart (CEWP) on the page and call the JavaScript via the webpart.
- Clean up the webpart settings a bit, i.e. Title = “Open in Explorer”, no visible Chrome, etc.
- Export the webpart and then import it via the webpart gallery so that the client can reuse it as often as they want.

Full code in OpenInExplorer.js
<script type="text/javascript"> <!-- Created by Hannah Swain, April 2013 https://sharepointhannah.wordpress.comUsing the “Open in Explorer” link on SharePoint 2013--> var CurrentSiteURL = document.location.pathname.split("/").slice(1,2).toString(); var ExplorerViewURL = "\u002f"+CurrentSiteURL+"\u002fShared\u0020Documents"; var LinkText = "Open Shared Documents in Explorer View" </script> <a onclick="NavigateHttpFolder(ExplorerViewURL, 'blank');" href="#"> <img style="height: 24px; width: 24px; border: 0px; padding-right: 5px;" alt="Open in Explorer" src="/Style Library/client/folder_yellow_explorer.png" /> <script type="text/javascript">document.write(LinkText);</script ></a> <span style="padding-left: 34px; font-style: italic;">Requires Internet Explorer 7.0+ and Active-X controls</span>
Credits
The following articles/forum threads helped me to figure this out: