Add a webpart to a view on any SharePoint list or library

Add a webpart to a view on any SharePoint list or library

One of my favorite features in SharePoint is the sheer power available in lists and libraries. I love teaching this part of the platform because there are so many hidden gems, functionalities that people really don’t know about but can make such a difference.

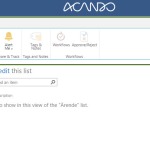
This post is about adding a webpart to a list or library  view page. This functionality has been available since SharePoint 2010. Did you know that every single view in SharePoint is its own page and has its own URL, so that you can link directly to it?  This means that every single view page can be edited so that you can add a webpart to it.

Continue reading

What is governance in SharePoint 2013?

Microsoft has a ton of information regarding SharePoint governance. Considering that it’s such a broad subject, lots of documentation is good. The challenge is finding the most important bits.

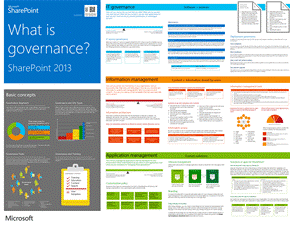
The article that provides the best overview is Microsoft’s Technet article What is governance on SharePoint 2013?  A related TechNet article is Governance planning on SharePoint 2013.It includes a download of one of my favorite Microsoft SharePoint governance resources: the huge overview image that shows how to tie it all together (see it on ZoomIt). Microsoft made one of these for SharePoint 2010 and possibly for SharePoint 2007. It has evolved as the product has matured but is a fantastic resource.

governance0


Calculated column: week number

I decided to organise a small project by using a SharePoint task list on a Office 365 project site. I figure that if it gets too complicated, I can always just open the entire thing in Microsoft Project.

I realized fairly quickly that seeing week numbers in the list was a valuable thing:

  • Group the tasks by week
  • See the total number of estimated hours per week

I created a calculated column and used the comments on this page, Group A List by Week Number. I ended up changing the formula a little bit – there are some activities in December and some in January, so I wanted to see the year, as well as the week number for sorting purposes.

My final formula:

=YEAR([Start Date])&"-"&If(Int(([Start Date]-Date(Year([Start Date]);1;1)+(TEXT(Weekday(Date(Year([Start Date]);1;1)-1);"d")))/7)=0;52;Int(([Start Date]-Date(Year([Start Date]);1;1)+(TEXT(Weekday(Date(Year([Start Date]);1;1)-1);"d")))/7))

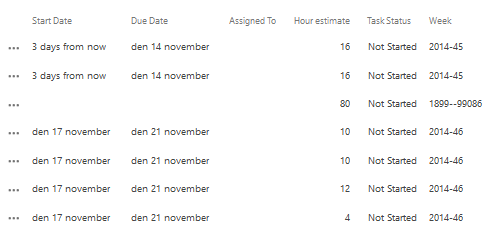
The final result looks like this:

weeknumbers

You can see an error on the third line: that’s because [Start Date] is empty on that line, so the week number could not be correctly calculated. I just wanted to get on with the project planning and not spend more time on the formula.

Once you have the week number in place, you can easily make views like this one, where I grouped by Week and then summed up the total hour estimate:

weeknumbers-hours2

The formula has the following considerations:

  • Weeks begin on Monday
  • Working with Swedish regional settings – you may need to change around a few periods, semi-c0lons, etc.

Adding a code snippet to page content on SharePoint 2013

Note: this post is written specifically for SharePoint 2013.

Sometimes it is necessary to add a snippet of code to just one page. Examples could be:

  1. Alternative CSS for just that page, i.e. to style a specific element
  2. Add a snippet of HTML and/or JavaScript, such as for a Google Maps or Youtube embed
  3. Add a piece of CSS to hide the left navigation on specific pages
  4. Add the Open In Explorer Link to a page

There are technically a number of ways to achieve this:

  1. Paste the code directly into the page contents (does not work)
  2. Paste the code into the the HTML source of the Content Editor Web Part (can work, depending on SP version and code)
  3. Use the Embed command  (can work, situational)
  4. Save the code in a text file, save it somewhere on your SharePoint site collection and call the text file via the Content Editor Webpart (my preferred method)

Option #4 is my favorite for a number of good reasons:

  • You can save the code centrally and then call it from multiple places without needing to replicate it
  • By saving it centrally, you only need to update it once if there are changes or updates
  • By saving it in the content database, you can access it from SharePoint Designer or similar, meaning you do not need to keep downloading-updating-uploading
  • It works consistently across all versions of SharePoint from SharePoint 2007 up to Office 365

For this example, I will be using a simple JavaScript which shows copyright information, in this case from 2010 to the current year. This allows the copyright to be kept up to date:

<p>All right reserved  &copy;
<script>
var cur = 2010;
var year = new Date(); 
if(cur == year.getFullYear()) year = year.getFullYear(); 
else year = cur + ' - ' + year.getFullYear(); 
document.write(year);
</script>
</p>

Option 1: Paste the code directly into the page content

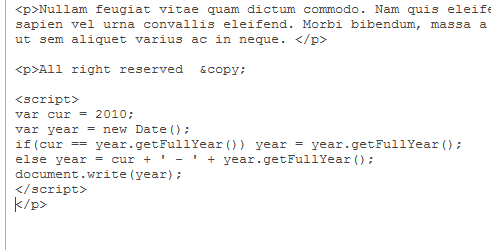
You can paste the code directly into the page content.
code-a

However, once you save the page and view it, you will see that SharePoint does not realize that it is code it needs to render in some way.

Conclusion: do not place code directly in the page content as it does not work.

Option 2: Edit source in rich text area / CEWP

In most content editor webparts and all rich text areas, there is a button in the ribbon called “Edit source”. This is great for quick fixes when content has gotten out of hand. In older versions of SharePoint, you could also use it to embed extra code.

Edit Source

You can easily paste your code straight into the Edit HTML window.

However, once you save, SharePoint lets you know that the code that it does not approve of has been stripped.

code3

In this case, some of the embedded code has been stripped out.

code-b

Sometimes SharePoint will strip out all of it and sometimes it will only strip out parts which can cause an odd result. When it doubt, check back into the HTML source to see what has happened with your code and if it is still 100% intact.

Conclusion: while this used to work under some older SharePoint versions, it is generally not a reliable solution for SharePoint 2013.

Option #3: Using the Embed command

SharePoint 2013 includes an Embed command in the ribbon which can be great for adding code snippets to your page:

code4

After clicking the command, you are prompted to insert your code and given a preview:

code-c

SharePoint creates a Script Editor webpart on the page for you. It even includes an “Edit Snippet” button, so you can go back and edit the code later.

code-d

The JavaScript is being displayed correctly in the webpart and also on publishing the page.

Conclusion: in my experience, this works but is dependent on the complexity of the code. Test well before using.

Option 4: save as a text file, call via CEWP

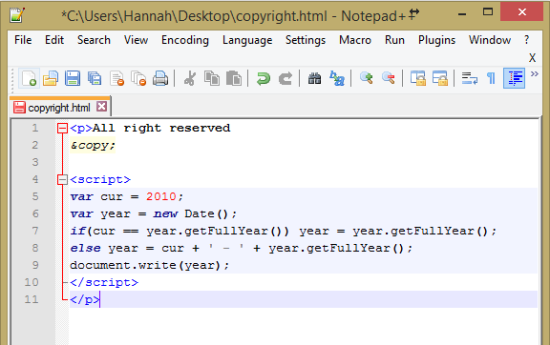
I have saved the JavaScript into a file called copyright.html. The file extension can help SharePoint determine how to parse the code when it is called, but you may need to experiment depending on your code – I have had good results from using txt, html and js extensions in the past.

Here is the file in Notepad++:
code-e

In this demo, I uploaded the HTML file to the document library on the same site as the page we are working with.

code-g

Tip: I tend to use the following rules of thumb as to where to upload these kinds of files:

  1. Think about if you want to save it in the standard Document library, or if you want to create a dedicated document library called “Scripts” or similar
  2. If the file will be called from just one single site, save it on the site
  3. if the file will be used across just one site collection, consider saving it at the root of the site collection or in the Style Library of that site collection (i.e. Styles/Scripts)
  4. If using across multiple site collections, choose the most logical place for it, i.e. on a root site collection

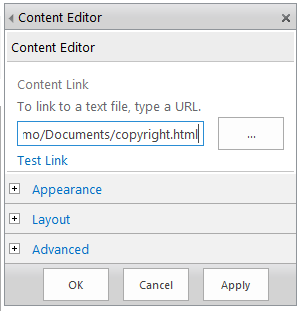
Next, place a Content Editor Web Part (CEWP) on the page and edit the webpart settings. At the top, add the link to the file and click “Apply” to save the changes.
code-h

The content should immediately display in the CEWP on the page.

code-i

Tip: if  you wish to use the same webpart in many places, you could export the configured CEWP and import it as a custom webpart. You can then place it on a page and it will already be configured for you.

Conclusion: this is my favorite method due to the central storage of the files, ease of editing the files and reusability.

SharePoint social and Harmon.ie favorites in Outlook


One of my current clients works with the Harmon.ie Outlook addon for copying emails and documents to SharePoint.  I believe it is a neat and useful tool which can complement OneDrive for Business.

I recently got a request to allow users to create favorite libraries/sites on SharePoint and have this list be synced with Harmon.ie.

Summary

Harmon.ie does not seem to have a way access SharePoint 2013’s “follow” functionality. This may be possible with registry edits or custom code, but I have not found the solution yet.

However, Harmon.ie can sync with the My Links list, which is part of the User Profile Service from SharePoint 2010 and onwards. Libraries can be added to this via the “Connect to Office” button. It is also possible in MOSS 2007.

SharePoint 2013 “follow”

In SharePoint 2013, new “follow” functionality has been added, allowing users to follow People, Documents, Sites, and #Tags. It is then possible to see updates via the newsfeed on your My Site.

follow1

The idea was to allow the client to select which sites they would like to follow, then use that information for two purposes:

  1. Display a list of favorite sites on the landing page
  2. Input for the “favorites” in the Harmon.ie Outlook client

The first goal turned out to be fairly easy – once I found out that the “Site” content type on the My Site is not actually searchable. There is a premade REST/jQuery soution available via I Am Following which worked beautifully.  The page includes a link to the code download on Codeplex.

The second turned out to be quite a bit harder. I spent a lot of time investigating the Harmonie documentation and tried everything I could find, including using registry edits for site propogation in the Harmon.ie favorites. That site propagation turned out to only work for the enterprise client, not the free client and was really more for prepolating the client with specific sites. I was not able to get the registry edit “SyncFavoritesWithMyLinks” working, as described on Add My Links to the sites and favorites lists.

Conclusion: there is currently no good way to sync the followed content on SharePoint 2013 with Harmonie.

However….

My Links

After lots of frustrating, I was rereading the documentation on the Harmonie site and came across the following:

When working with SharePoint 2013/2010, harmon.ie adds the document libraries defined via the SharePoint 2013/2010 ribbon button Connect to Office to your favorites list.

Source: Favorite Locations

My Links is the old bookmarking functionality in SharePoint, used in SharePoint 2007 and 2010. It was replaced by the follow functionality in SharePoint 2013. It requires the User Profile service to be enabled, as it is a per-user list.  Clicking the button adds the current library to My Links.

You can access this, exactly as the documentation states, via the Library tab of document libraries:

follow3

This same functionality is used to create shortcuts in Microsoft Office applications for opening and saving documents.

To make this document library be added to the favorites in your Harmon.ie client, follow these steps:

  1. Click the “Connect to Office” button in the applicable library
  2. Restart Outlook (the list is checked on application startup)
  3. Find the new list in your favorites in Harmon.ie

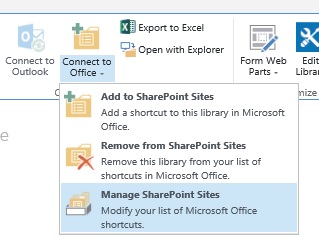
You can maintain the My Links list by clicking on the dropdown on the Connect to Office button. You’ll see that the list looks pretty much as it did in SharePoint 2007.

follow4


Sources

Harmon.ie: Favorite locations (in Outlook)

Office Blogs: Following in SharePoint 2013

Thanks go to Wictor Wilén for his tips

Calculated column for priority on a SharePoint list

I’m currently working on a project where we needed to assign a priority to issues based on impact and urgency. You could always let users figure this out for themselves, but it’s much better to automate it when there are clear definitions for each value and a table which translates the impact and urgency to priority.

Continue reading