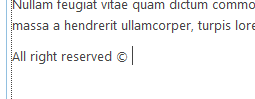
I have rarely seen clients use the Reusable Content option. Occasionally it will be used to add a disclaimer to a page – but often that’s best placed in a page layout for a specific page type anyway. There just doesn’t seem to be much of a use for it, though I’ve always wondered if there could be a really useful application.
In a recent project, Daniel Gustafsson found two really cool uses for it: adding a floating image to page content and adding numbered bullet points which are highly styled. These are by far the most interesting uses I have ever seen for the Reusable Content, which is why I asked Daniel if I could share them with you here.
This example is done using SharePoint 2013, but should work for all versions. Be careful with the HTML5 on older versions of SharePoint, though. You will need to add your own CSS.
This article will discuss how to handle an image with float left:

And it will also handle numbered bullet items:

What is Reusable Content?
Reusable Content allows end users to save snippets of commonly used text or HTML which can then easily be put onto a page.
All Reusable Content is saved into one list per site collection, always saved at the root in the list Reusable Content.
Reusable content can be anything you might need to reuse:
- Byline
- Disclaimer text
- Standard piece of HTML
- “About me” text
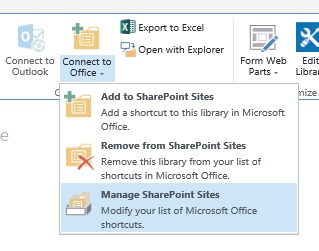
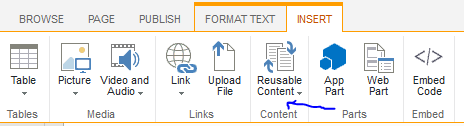
Once a piece of content has been added to the Reusable Content list, it can be added to a page by clicking the Reusable Content button in the ribbon and then choosing the item from the list.
Reusable Content items come with an interesting feature called “Automatic Update”. If you turn this on for an item and update the content, it will update everywhere the Reusable Content has been placed. this can be extremely useful in many places. In the following two examples, it must be turned OFF for the functionality to work correctly.
Image float left
Image float left inserts an image with text possibilities into the page, floated left:
The default image is configured as a basic placeholder, giving the user something to click. Once the image is selected, you can choose a new image via the Replace Image option in the ribbon.

The texts can be replaced just by clicking on them and changing them to whatever the user needs. The texts also keep their formatting, as long as the user doesn’t delete too much of the reusable content item.
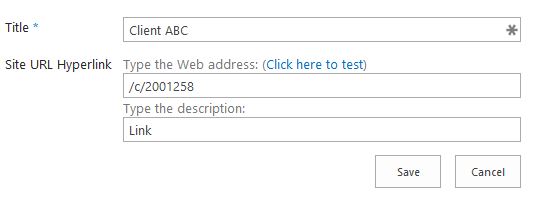
Configuration in Reusable Content List
Note: automatic update must be set to no.
Reusable HTML (remember to edit HTML source when editing):
<figure class="float-left box-story"><img alt="image" src="/Common-Image-Library/placeholder.jpg" _moz_resizing="true" style="width: 300px; height: 300px;"/><figcaption>
<header>Header for box story</header>
<p>“Box story body text”</p> </figcaption> </figure>
Bullet points with header
Sometimes the default unordered list in SharePoint is overly boring, even after styling it. The developers in this project came up with a much cooler way to display the content:
It’s a little fiddly in the implementation and later changes – adding something in between the current header 2 and header 3 is difficult, for example. However, when you are looking for a very stylized front-end website, it may very well be worth it.
This content actually consists of two pieces of Reusable Content: first, the Numbered List Item Wrapper is placed. Afterwards, the Numbered List Items can be placed into that wrapper.
Numbered list wrapper
Note: automatic update must be set to no.
Reusable Content HTML:
<div class="numbered-list">MARK TEXT and add reusable content numbered list ITEM</div>
When this is placed on the place, it simply shows the text shown in the div. To use it properly, select the text and then choose the numbered list item from the Reusable Content.
Selecting the text simply ensures that the actual list items are placed inside the list wrapper div.
Numbered list item
Note: automatic update must be set to no.
Reusable Content HTML:
<div class="numbered-list-item">
   <div class="numbered-list-item-content">
      <header>Numbered item with header</header>
      <p>Body text for numbered list item</p>
   </div>
</div>
Add this Reusable Content item to the wrapper as described below, simply adding more bullets until there are as many as you would like that. Afterwards, edit the headers and texts to match what is required.
CSS for the numbered list reusable content
/* ------------------------------------------ */
/* NUMBERED LIST CSS */
/* ------------------------------------------ */
.numbered-list {
    counter-reset: numlist;
    border-top: 1px solid #CBC7C2;
}

.numbered-list-item {
    border-bottom: 1px solid #CBC7C2;
    padding: 15px 0 4px 1px;
}

.numbered-list-item:before {
    counter-increment: numlist;
    content: counter(numlist);
    -webkit-border-radius: 999px;
    -moz-border-radius: 999px;
    border-radius: 999px;
    width: 10px;
    height: 10px;
    padding: 8px 10px 12px 11px;
    background: #b4a76c;
    color: #fff;
    text-align: center;
    font: bold 14px/1 HelveticaNeueSerif, serif;
    font-size: 1.16667rem;
    float: left;
    margin-top: -5px;
}
.numbered-list-item-content {
    margin-left: 42px;
    padding: 0 0 0;
}
.numbered-list-item-content header {
    font: bold 15px/1.2 HelveticaNeueSerif, serif;
    color: #404040;
    font-size: 1.25rem;
    font-weight: bold;
    margin: 0 0 10px 0;
}
.numbered-list-item-content p {
    margin-top: 0;
}